Showing posts with label crochet gifts. Show all posts

Thursday, March 24, 2016

Scrap Yarn Afghans

I really, really, really like to make afghans out of scrap yarn. It may be classified as a sickness, OCABD (Obsessive Compulsive Afghan Building Disorder.) Not sure, not a doctor. Anyhow, I'd like to share some of my kooky ideas and inspirations, and maybe you can get a glimpse into my afghan madness!

Although I like my afghans to look random, my anxiety and compulsiveness won't allow it. So, I devise a set of rules for each afghan. Crazy? Maybe. Effective? Certainly! I will include some examples of my "rules" with each sample afghan to illustrate my point. So, the most important first steps seem, to me, to be figuring out a theme or color scheme, and devising which pattern you would like to use. I've used various types of granny squares, granny triangles, stripes, v-stitch stripes, ripples, and even made a few star-shaped afghans.

Granny squares, using variegated and multi-color yarn with no white in it (except the one square that is black and white only.) The centers of the squares are made up of two to five rows of the variegated color, then enough black edging to make the finished size six rows.
Ripple afghan based on the pattern "Rustic Ripple" in the book "Ripple Afghans to Crochet" by Leisure Arts. Crocheted with two strands at once, and alternating colors in rainbow order. At least one row, but no more than five rows per two-stranded color combination.


Based on "Super Star Afghan" by The Crochet Crowd on YouTube. All shades of yellow and gold. Each color is at least two, but no more than five rows.

Granny Square Stripes. Each square is made of 1-2 rows of a color from the color scheme (red, burgundy, orange, peach, brown) and 1-2 rows of black, to make each square 3 rows in total. Crochet 80 squares. Ten squares are fastened together to form a strip, eight strips in total, and one of the contrast colors is used to make a row of single crochet around each strip. Using black, make a row of double crochet around each strip. Attach strips together with black, and finish with a row of double crochet around entire perimeter.
Ripple afghan based on the pattern "Rustic Ripple" in the book "Ripple Afghans to Crochet" by Leisure Arts. Made with two strands of yarn at once. Colors are orange and peach, and variegated/multi-color yarn with orange in it as well. Alternate solid sections with variegated sections. Each section should be at least two rows, but no more than five.


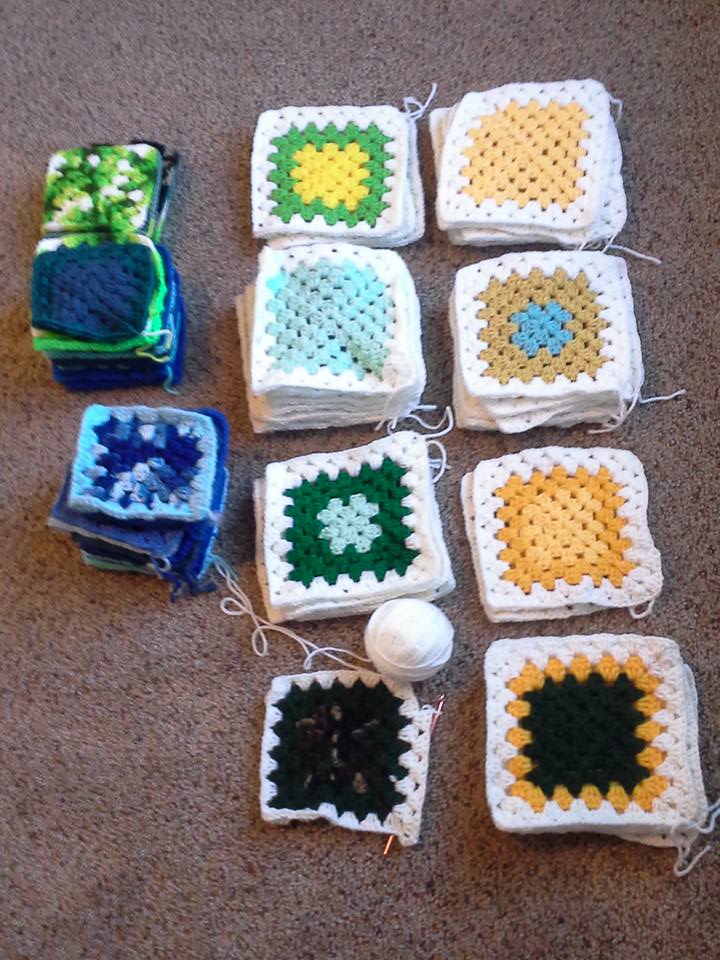
Granny squares made with orange, green brown, and variegated yarn containing those same colors. Colored portions of  squares are at least two, but not more than five rows. Edges are between 1-4 rows of white, enough to make each square six rows in total.
Wheel granny squares. Pattern can be found in "Vanna's Afghans A-Z," by Leisure Arts, as part of her "Zebra "Garden" pattern. Pink, purple, mauve, and blue, as well as variegated containing those same colors. First two rows of center "wheel" are same color, last row is different. First two rows of square portion are the same, last is different. All the squares are joined together by light pink yarn, using a single crochet and single crochet rows of various colors make up the border.


Now I just have about a dozen more to finish up! (sigh) I really may have a problem!
Thanks to my sister, Katie, and my aunt, Roni, for sending over pictures of the afghans I made for their families!




Thursday, January 28, 2016

Mouse Ears Purse

I came across this idea on Pinterest and decided I had to give it a try! Since I have two nieces under the age of five, it seemed like the ideal gift for Christmas this last year. And, since my crochet skills are somewhat limited, especially when working from a written pattern, I was relieved to discover that this pattern was very simple and easy to follow. Since the writer of the pattern has asked that the pattern not be copied outside her website, I decided to write a blog post just to show you the basics of what is involved in the project. If you're anything like me, you'll want to know what you are in for before you start the project. A link to the written pattern will be provided at the bottom of the page.


First, the things you will need to acquire are black yarn, and a contrast color for the edging, bow, and strap. Pink or red are more traditional Minnie Mouse colors, but you can use whatever color the little girl you're making it for might like. I used a seafoam green for one, and mauve for the other. You will also need a size "G" and a size "H" crochet hook, a yarn needle, and scissors. The stitches you will need to know are: chain, slip stitch, half-double crochet, and double crochet. If you need any help with these basic stitches, you can visit my Basic Crochet Stitches blog post. You will also be using a magic circle, but there is a video for that on the pattern website.

You will make two large circles for the head, and four smaller partial circles for the ears. Once you stick them together you can use your contrast color for edging, and then to make a bow and strap.

Once you have all your pieces made, you just have to sew them all together, leaving the opening at the top to make the purse. Simple enough, right? I thought so! It only took a few hours for each purse, and I think the results are super cute! Now, if this is a project  you would like to undertake, you can find the pattern here: Crochet Minnie Mouse Purse.


Tuesday, December 23, 2014

Seashell Christmas Ornaments

These ornaments are super cute! I decided one Christmas many years ago that I would make Christmas ornaments to sell to my co-workers to make extra money. I invented these seashell ornaments as part of my stock to sell. I never made any real money, but everyone loved my seashell ornaments! Since I already had a bunch of seashells on hand, this was a fairly cheap project to complete. You will need some seashells that are large enough and thick enough to endure having holes filed in them, a drill, a small drill bit (I think the one I used here was 3/32), small glass or wooden beads with holes large enough for your thread to be drawn through (I found tiny pre-drilled shells in my bead box and decided to use those,) a small crochet hook (I used a size 10) and some crochet thread.


First off, find some interesting looking shells that are thick enough, and have openings large enough, to drill some holes in.


Make your holes as close as possible to the edge of the shell, without breaking it.


Locate the beads that you would like to crochet into the hangers, or, in my case, the tiny shells. Put your beads into a bowl or dish so they are easy to pick up as you are crocheting.


Make a slipknot in your crochet thread and pass your hook through the thread, and then through the hole in your shell. Yarn over and draw through the slipknot to form a stitch around your shell. Draw the thread tight around the shell, but be very careful and pull gently to prevent your thread from being cut by the edge of your shell.

Decide how far apart you would like your beads to be, and count out how many times you chain so that you can space the beads evenly around the hanger. I chained five, then attached my tiny shell. Make a stitch around your bead just as you did to attach your thread to the shell in the beginning. The stitch to attach your bead, and the following chain do not count in your spacing, they are just to lock the bead into place. So, stitch once through the bead, chain once to lock it, then start counting your chain stitches for spacing. Continue until your hanger is long enough to slip over a branch on your tree, then, after your last set of spacing chains, slip stitch to beginning stitch (the one that you used to attach your thread to the shell.) Fasten off and tie the tail from your beginning stitch to the tail on your ending stitch.

Use your crochet hook to weave in your tails, I wove them in just up to the first bead, and trim off excess.


There you have it! Put it on your tree! I like to make a set of 5 or 6, using different colors and shapes of shells.

Tuesday, December 16, 2014

Crochet Soap Savers

This idea came from Joanna Martinez's video on YouTube How to Crochet a Soap Saver. I decided to whip up a few of these fellows for some of the residents at the nursing facility where I work, as a few of the people there are allergic to the body wash that the facility provides, or have skin conditions that require them to use a specific brand of soap. In our showers at the facility there is really nowhere to store a bar of soap, so this idea was perfect, as it could hang on the shower knob. It also works well as a body sponge, just leave the bar of soap inside and scrub with the soap saver. This helps you to use up those little slivers of soap left at the end of the bar's life, too. When the soap gets small enough, just slip another bar in there along with it!
Since I already had all of the materials, this project was free for me to make! All you need is some worsted weight cotton yarn, a crochet hook (The pattern calls for a size G, I used a size I, since I know that I crochet much tighter than most folks do,) a tapestry needle, and a pair of scissors. Don't be afraid to use a larger hook or add some extra lines if you crochet tighter than most folks, or if you are trying to accommodate a larger bar of soap. I often find skeins of cotton yarn at the thrift shop, but they are very easy to find in stores as well. Any craft store will carry cotton yarn, and you can find it in the craft departments of stores like Wal-Mart or Ace Hardware for a few dollars a skein.