Showing posts with label crochet. Show all posts

Thursday, March 31, 2016

Crochet Rag Rugs


The first step to making a crochet rag rug is making your rag yarn. My favorite things to turn into rag yarn are sheets and pillow cases because they are cotton, they don't stretch, they come in all sorts of different colors and patterns, and you can find them cheap at thrift shops and yard sales! You could also use fabric scraps from sewing projects, or old t-shirts if you don't mind the stretchiness. Heavier fabrics like denim can be used, but will need to cut thinner and are a bit more difficult to work with (because they are heavier and thicker.) Choose a color scheme, hit the thrift shop, and stock up! Don't be afraid to mix patterns, because you won't likely be able to distinguish the patterns very easily once the fabric is in rug form. I just bought new pillow cases, so my source material for this demonstration will be all the random cases that I would have otherwise thrown away.


Once your source materials are gathered, cut or tear into strips about 3/4 to 1 inch wide. I like to use pinking shears so there is less fraying and fewer strings to deal with.


Once you've got a pile of fabric strips you can get started sticking them together. There are a couple different ways that I know of to do this.
The first method is to sew the strips together, end to end to form your yarn. This will give you a cleaner look, but is more time consuming. Besides, I like a rustic look for my rag rugs, so I use the second method:
Cut a slit in the end of each strip.


Pass the end of one strip through the slit in the other, then pass the long end of the first strip through it's own slit.


This will make little slipknots, which are easier to work with while crocheting than if you had just tied the ends together, making big bulky knots.
I'm sure that there are other ways of doing it, but I have yet to figure them out. So, these are the methods I go with!


If you need a bit more help with the attachment of the strips, here is a video that shows the method a bit clearer. Skip right to 5:08 for instructions on making rag yarn.


Wind your rag yarn into a ball as you add more strips, that way you won't end up with a huge tangle. Once you have a goodly sized ball, it's time to begin. I tend to make my fabric rugs into small round rugs, but there are all sorts of shapes and sizes you can make.
I've started a rectangular rug with the rag yarn I made for this post. In addition to circles and rectangles I've seen squares, ovals, hearts, and all sorts of different patterns and combinations. I found a few easy patterns online to give you some inspiration, and some guidance. I'm not a good pattern writer, so I found some folks who were!

Thursday, March 24, 2016

Scrap Yarn Afghans

I really, really, really like to make afghans out of scrap yarn. It may be classified as a sickness, OCABD (Obsessive Compulsive Afghan Building Disorder.) Not sure, not a doctor. Anyhow, I'd like to share some of my kooky ideas and inspirations, and maybe you can get a glimpse into my afghan madness!

Although I like my afghans to look random, my anxiety and compulsiveness won't allow it. So, I devise a set of rules for each afghan. Crazy? Maybe. Effective? Certainly! I will include some examples of my "rules" with each sample afghan to illustrate my point. So, the most important first steps seem, to me, to be figuring out a theme or color scheme, and devising which pattern you would like to use. I've used various types of granny squares, granny triangles, stripes, v-stitch stripes, ripples, and even made a few star-shaped afghans.

Granny squares, using variegated and multi-color yarn with no white in it (except the one square that is black and white only.) The centers of the squares are made up of two to five rows of the variegated color, then enough black edging to make the finished size six rows.
Ripple afghan based on the pattern "Rustic Ripple" in the book "Ripple Afghans to Crochet" by Leisure Arts. Crocheted with two strands at once, and alternating colors in rainbow order. At least one row, but no more than five rows per two-stranded color combination.


Based on "Super Star Afghan" by The Crochet Crowd on YouTube. All shades of yellow and gold. Each color is at least two, but no more than five rows.

Granny Square Stripes. Each square is made of 1-2 rows of a color from the color scheme (red, burgundy, orange, peach, brown) and 1-2 rows of black, to make each square 3 rows in total. Crochet 80 squares. Ten squares are fastened together to form a strip, eight strips in total, and one of the contrast colors is used to make a row of single crochet around each strip. Using black, make a row of double crochet around each strip. Attach strips together with black, and finish with a row of double crochet around entire perimeter.
Ripple afghan based on the pattern "Rustic Ripple" in the book "Ripple Afghans to Crochet" by Leisure Arts. Made with two strands of yarn at once. Colors are orange and peach, and variegated/multi-color yarn with orange in it as well. Alternate solid sections with variegated sections. Each section should be at least two rows, but no more than five.


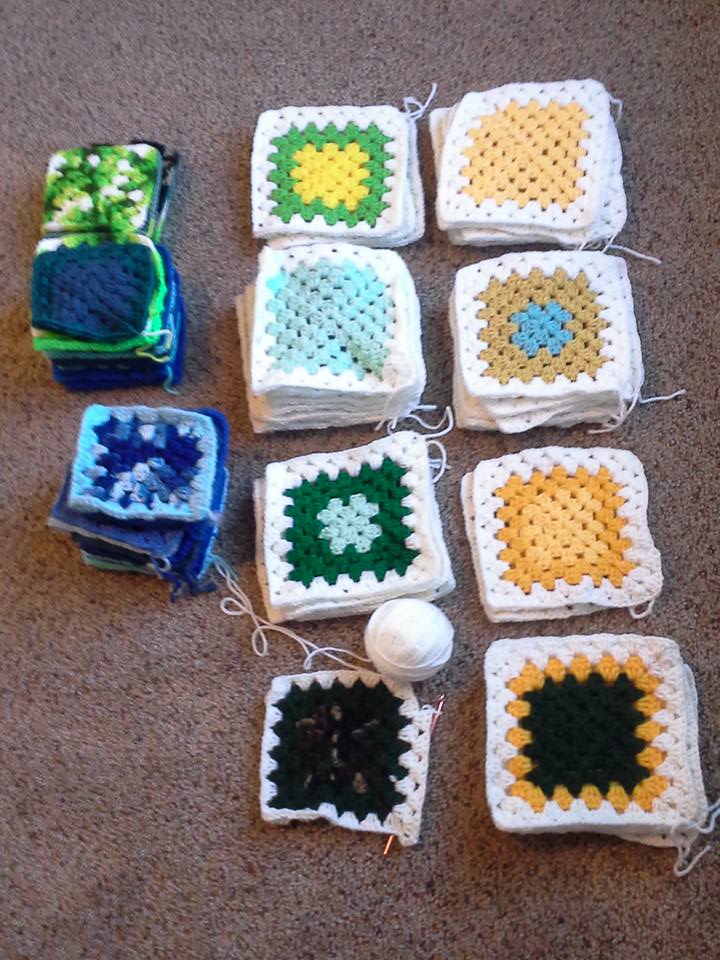
Granny squares made with orange, green brown, and variegated yarn containing those same colors. Colored portions of  squares are at least two, but not more than five rows. Edges are between 1-4 rows of white, enough to make each square six rows in total.
Wheel granny squares. Pattern can be found in "Vanna's Afghans A-Z," by Leisure Arts, as part of her "Zebra "Garden" pattern. Pink, purple, mauve, and blue, as well as variegated containing those same colors. First two rows of center "wheel" are same color, last row is different. First two rows of square portion are the same, last is different. All the squares are joined together by light pink yarn, using a single crochet and single crochet rows of various colors make up the border.


Now I just have about a dozen more to finish up! (sigh) I really may have a problem!
Thanks to my sister, Katie, and my aunt, Roni, for sending over pictures of the afghans I made for their families!


Thursday, January 28, 2016

Mouse Ears Purse

I came across this idea on Pinterest and decided I had to give it a try! Since I have two nieces under the age of five, it seemed like the ideal gift for Christmas this last year. And, since my crochet skills are somewhat limited, especially when working from a written pattern, I was relieved to discover that this pattern was very simple and easy to follow. Since the writer of the pattern has asked that the pattern not be copied outside her website, I decided to write a blog post just to show you the basics of what is involved in the project. If you're anything like me, you'll want to know what you are in for before you start the project. A link to the written pattern will be provided at the bottom of the page.


First, the things you will need to acquire are black yarn, and a contrast color for the edging, bow, and strap. Pink or red are more traditional Minnie Mouse colors, but you can use whatever color the little girl you're making it for might like. I used a seafoam green for one, and mauve for the other. You will also need a size "G" and a size "H" crochet hook, a yarn needle, and scissors. The stitches you will need to know are: chain, slip stitch, half-double crochet, and double crochet. If you need any help with these basic stitches, you can visit my Basic Crochet Stitches blog post. You will also be using a magic circle, but there is a video for that on the pattern website.

You will make two large circles for the head, and four smaller partial circles for the ears. Once you stick them together you can use your contrast color for edging, and then to make a bow and strap.

Once you have all your pieces made, you just have to sew them all together, leaving the opening at the top to make the purse. Simple enough, right? I thought so! It only took a few hours for each purse, and I think the results are super cute! Now, if this is a project  you would like to undertake, you can find the pattern here: Crochet Minnie Mouse Purse.


Thursday, December 31, 2015

Things to Save or Find for Crafts and Projects


Egg Cartons

Eggs (Duh!)

Milk Cartons


Yogurt Tubs


Broken Jewelry

Beads
2d Christmas Tree


Dryer Lint


Old Candles


Jeans

Emergency Water Filter
Denim Quilt
Braided Denim Rug

Broken Crayons

Crayon Candles
Wax Paper Stained Glass

Bandannas

Bandanna Quilt
Bandanna Babies

Sheets

Flat Sheet Quilt
Rag Rug

Pillow Cases

Rag Rug
Pillow Case Dresses

Bleach Bottles


Scrap Yarn

Scrap Yarn Rug
Scrap Yarn Afghans
Crochet Birds and Baubles
Plastic Canvas Mitten Ornaments

Plastic Grocery Bags

Grocery Bag Shopping Bag
Trash Can Liners

Felt

Felt Potpourri Sachet Ornaments

Newspaper

Paper Beads
Charcoal Starting
Pinatas
Paper Mache
Seed Paper

Magazines

Paper Beads
Framed Photos

Wire Hangers

Underwear Hanger

Picture Frames

Pressed Flower Art
Children's Book Framed Prints
Family Tree Wall Hanging

Rocks

Painted Rock Cactus Garden
Painted Rock Tombstones

Nuts

Walnut Strawberry Ornament

Kids' Books

Children's Book Framed Prints

Cinder Blocks

Cinder Block Book Shelf

Drink Bottles


Scrapbook Paper

Paper Beads

Teacups

Teacup Flower Arrangements

Paper Towel and Toilet Paper Tubes


Towels

Bath Mitts

Seashells


Scrap Fabric

Rag Rugs
Scrap Fabric Heart Gift Cards

Buttons


Greeting Cards