Showing posts with label gifts to make. Show all posts

Thursday, December 31, 2015

Things to Save or Find for Crafts and Projects


Egg Cartons

Eggs (Duh!)

Milk Cartons


Yogurt Tubs


Broken Jewelry

Beads
2d Christmas Tree


Dryer Lint


Old Candles


Jeans

Emergency Water Filter
Denim Quilt
Braided Denim Rug

Broken Crayons

Crayon Candles
Wax Paper Stained Glass

Bandannas

Bandanna Quilt
Bandanna Babies

Sheets

Flat Sheet Quilt
Rag Rug

Pillow Cases

Rag Rug
Pillow Case Dresses

Bleach Bottles


Scrap Yarn

Scrap Yarn Rug
Scrap Yarn Afghans
Crochet Birds and Baubles
Plastic Canvas Mitten Ornaments

Plastic Grocery Bags

Grocery Bag Shopping Bag
Trash Can Liners
Felt

Felt Potpourri Sachet Ornaments

Newspaper

Paper Beads
Charcoal Starting
Pinatas
Paper Mache
Seed Paper

Magazines

Paper Beads
Framed Photos

Wire Hangers

Underwear Hanger

Picture Frames

Pressed Flower Art
Children's Book Framed Prints
Family Tree Wall Hanging

Rocks

Painted Rock Cactus Garden
Painted Rock Tombstones

Nuts

Walnut Strawberry Ornament

Kids' Books

Children's Book Framed Prints

Cinder Blocks

Cinder Block Book Shelf

Drink Bottles


Scrapbook Paper

Paper Beads

Teacups

Teacup Flower Arrangements

Paper Towel and Toilet Paper Tubes


Towels

Bath Mitts

Seashells


Scrap Fabric

Rag Rugs
Scrap Fabric Heart Gift Cards

Buttons


Greeting Cards

Thursday, August 13, 2015

Drink Bottle Flower Vase

So, a while back there was a lady at my nursing home who was not doing so well. I decided to bring in some flowers to spruce the place up. My only problem? No flower vase. I decided to make my own!

I found an empty sports drink container and decided that I could figure out how to make it cute! 

First I took off the label and the cap. 

Next, I rinsed it out and cut off the neck. 

After it had dried out a bit, I found a metallic marker to decorate it with. It doesn't have to be metallic, I just happened to have a metallic one and decided to make my vase fancy! 

After you have fancified the vase, you will need some flowers. If you have some growing in your yard, go ahead and use those. All my flowers had either died or been eaten by goats, so I went down to the vacant lot on the corner. 

There I found a bunch of scarlet mallow, and cut a handful. 

I took them home, rinsed off the bugs, trimmed away some leaves and added them to my vase. I added a bit of water and took it over to the nursing home. 


Tuesday, December 16, 2014

Crochet Soap Savers

This idea came from Joanna Martinez's video on YouTube How to Crochet a Soap Saver. I decided to whip up a few of these fellows for some of the residents at the nursing facility where I work, as a few of the people there are allergic to the body wash that the facility provides, or have skin conditions that require them to use a specific brand of soap. In our showers at the facility there is really nowhere to store a bar of soap, so this idea was perfect, as it could hang on the shower knob. It also works well as a body sponge, just leave the bar of soap inside and scrub with the soap saver. This helps you to use up those little slivers of soap left at the end of the bar's life, too. When the soap gets small enough, just slip another bar in there along with it!
Since I already had all of the materials, this project was free for me to make! All you need is some worsted weight cotton yarn, a crochet hook (The pattern calls for a size G, I used a size I, since I know that I crochet much tighter than most folks do,) a tapestry needle, and a pair of scissors. Don't be afraid to use a larger hook or add some extra lines if you crochet tighter than most folks, or if you are trying to accommodate a larger bar of soap. I often find skeins of cotton yarn at the thrift shop, but they are very easy to find in stores as well. Any craft store will carry cotton yarn, and you can find it in the craft departments of stores like Wal-Mart or Ace Hardware for a few dollars a skein.

Thursday, December 11, 2014

Plastic Canvas Bookworm Book Marks


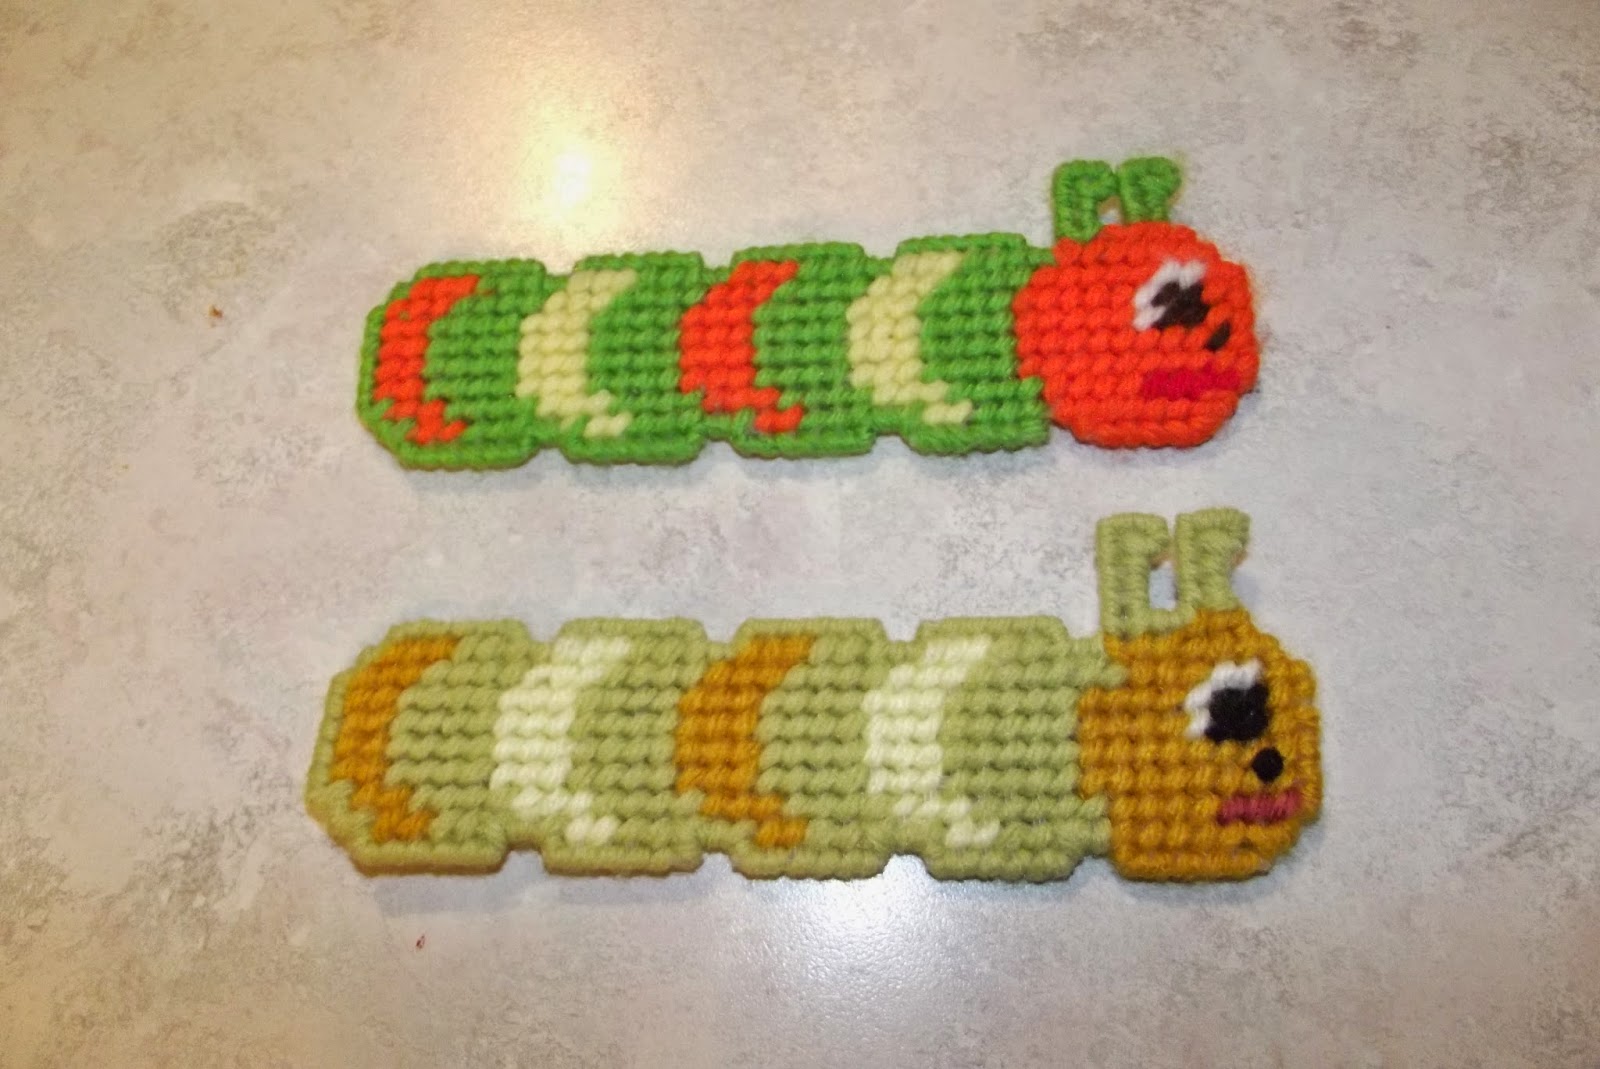
Willie made one of the little fellows when he was a youngster,  and I decided to figure out how to reproduce it.  I made myself a book worm, and I thought it would be a cute project to make for kids, or to help kids make for someone else. Sorry for the hand drawn pattern, but I had to sort of reverse-engineer this little guy. The black lines are your cutting lines. It's hard to tell, but his red mouth is on the second row from the bottom of his head. The colors listed in the pattern are just suggestions. If you find a wormy color combination that you would like to use, go for it! I have used green, yellow, orange, and brown, and any shade of each color. Just put together what looks good to you!

Bookworm shape
First, cut out your bookworm shape from 7-mesh plastic canvas. Trim off all the little pegs left over from cutting.

Stitch his stripes first
This handsome brown model just needs a face!


I like to make his stripes first, and then fill in the main colors, so, using one of your contrasting colors, stitch on the stripe on his butt, then switch to your next contrasting color for his next stripe.


Stitch his head, but leave spaces to stitch on his eyes, nose and mouth. If you forget to leave a space for his nose, don't fear! Just put a french knot there, and no one will know the difference!


Once all his details are stitched on, you just have to finish his edges. His body and antennae get finished with your main color, and his head gets finished with its matching color (orange, in my pattern.)

The worm at top is Willie's, bottom is my first attempt to recreate.

Thursday, December 4, 2014

Craft Stick Puzzle

Ran across this super cute idea for a hand made children's gift the other day. I had saved a few illustrations from one of my favorite childhood books, and was trying to figure out what to do with them. Melissa at Fireflies and Mud Pies shared this idea last year on her blog using illustrations from a Christmas book. I didn't quite have all the same supplies, so I made do with what I had and changed it up a little

Since I didn't have modge podge, I had to get a little creative with tacky glue and clear coat.
First, I measured out how many sticks I would need for the illustration I wanted to use.
Next, I trimmed the illustration to make placing my sticks a bit easier.
I turned the illustration over and traced my craft sticks onto the back.
After that, I cut my illustration into stick-shaped strips.
Using the tacky glue, and a little water to thin and smooth the glue, I adhered the strips to the sticks.


I found some weighty books to pile on top while they dried, to make sure that everything stayed straight and flat.
Once dry, I took my sticks outside and gave them a few layers of clear coat. I should have been a bit more careful about moving them around on the newspaper so they didn't stick to it. My bird got a little paper stuck on its cheek. I got most of it off, though.
To finish up my project, I trimmed the excess paper from around the edges using my rotary cutter (you could also use an exacto knife, but I wasn't sure where mine was) and used an old emery board to sand and round the ends. I think it turned out pretty darn cute!

Monday, December 1, 2014

Counting Down with Gifts for Christmas


Well, Christmas is my favorite holiday, so I figured I would do a Christmas series to celebrate. All during December I will show you easy gifts to make and give! The majority of these gifts are made from items that are practically (if not completely) free! Nothing too fancy, just cute ideas that you can whip up in a hurry to fill a stocking or add a little something extra to a gift.  I have updated this list to include all the crafts that I published this month, for your convenience!

Bleach Bottle Toy Tote
Bead, Bauble and Pendant Ornaments
Craft Stick Puzzle
Tied Scrap Fabric Christmas Trees
Plastic Canvas Bookworm Book Marks
Braided Christmas Card Display
Crochet Soap Savers
Button Christmas Cards
Seashell Christmas Ornaments
Loom Knit Hats


Thursday, July 31, 2014

Bleach Bottle Toy Tote

When I was a kid I had a few of these totes, which my mom made for me, to carry around my bunny blocks, dress up jewels and toy hippos, ants, sharks, and dinosaurs. The base can be made from a bleach bottle, milk jug, industrial sized sauce containers, basically and large, lightweight plastic container. Just make sure that the plastic is soft enough that it won't have sharp edges when you cut it apart.
What you will need:
Plastic jug
Exacto knife or sharp scissors
Crochet hooks, sizes G and N
Skein of yarn, any color you choose
WD-40
Paper towel

First, wash and rinse the container thoroughly. Next, cut off the neck and handle, leaving just the bucket-shaped base. Spray a bit of WD-40 onto the adhesive, let it sit for a few minutes and wipe it away. Use a bit of soap and water to remove the WD-40.
Using a hole punch, punch holes evenly around the top of the entire container, close to the top, and close to one another, without compromising the integrity of the edge.


Round 1: Attach the yarn with a slip stitch in any hole, using a size G hook. Chain 2 (this will count as your first double crochet), double crochet in each hole around the entire top of container. Slip stitch to join last double crochet to top of beginning chain 2.
Round 2: Chain 3 (this will count as your first double crochet and chain one space), double crochet in next double crochet. Chain one and double crochet in next double crochet, repeat all around, ending with a chain one, slip stitch to second chain in beginning chain 3.
Repeat round 2 until desired length is achieved.  
Once it is as long as you'd like, you can add a ruffle if you'd like. For the ruffle, chain 2, double crochet in the same stitch. Make two double crochet in the next chain one space, two double crochet in the next double crochet. Continue around and slip stitch to join at top of beginning chain 2. Weave in your end.
I made two drawstrings by crocheting two matching strings by using a chain stitch, then, using the size N crochet hook, wove them through the last row before the ruffle from opposite sides, and then tying each drawstring together at the end. 


Once completed, I filled it with dress up jewelry for my niece who is just turning 3.


Need help with the crochet? Check out my Basic Crochet Stitches post!