Wednesday, November 25, 2015

Regrowing Celery


I had read an article a while back that you could sprout a new celery plant from the base after you cut the stalks off. I was intrigued. This means that as long as you keep the plant alive, it will continue to produce new stalks of celery. Perpetual food source? Sign me up! I had purchased a bundle of celery to cut up and put away for my lunches, but then I caught the "lazies" and never cut it. Eventually it was too rubbery for me to want to eat, so I figured I had better plant it.


I cut the stalks off of the base, and set it aside for sprouting. Next, since I wasn't going to eat it myself, I cut it into bite-sized pieces for the goats to eat. They don't care much for celery, so they gave me a look as if to say, "Seriously? This crap again?" and then eventually ate it.


The little celery stump has a nub on the bottom where it was cut away from the roots. Eventually this is where the new roots will come from, we just need to keep it in water long enough for it to grow some new stalks and leaves that are tall enough to poke out of the dirt.


I got a little ramekin down from the kitchen cabinet, put my little stump in it and added water.


I placed it in my kitchen window so that it would get lots of sunlight to encourage it to grow. I changed the water every few days. It should be noted that as it soaks around in the water the outer stalks will eventually break down and begin to rot. You should remove them as they get mushy so that they don't kill the cute little stalks growing up from the center.


After just a few days I could see the stalks in the middle beginning to rise up.


A few days later there were leaves, and after about 2 weeks or so I had stalks with leaves on them that were tall enough to poke out of the dirt. It was planting time!


The next thing I had to figure out was a container for planting. Luckily I had made a Mandarin Orange Jell-o salad not long ago, and kept my Kool-Whip container.


I drilled some holes in the bottom for drainage, and kept the lid to use as a saucer. (Next time I will make larger holes. These holes did not allow for much drainage.)


Next I put enough soil in the bottom to hold the plant at the proper height, and filled in all around it.

My celery took transplanting really well, and is continuing to grow. The only thing I wish I had done differently is to remove a spot of mold that was on one of the outer stalks before I planted it. It just meant that I had to do battle with moldy soil for a week or so, but I eventually conquered!

Thursday, November 19, 2015

Mom's Oatmeal Chocolate Chip Cookies


This recipe is really fantastic. Especially if you already have the quick mix made (see my blog post All-Purpose Baking Mix to find out how to make it) or you can use store-bought (such as Bisquick.) I told Willie I would be baking some and he said "Hmm, that'll work." (That's his way of saying that it's something he'd like to try.)

So, here's what you'll need:

3 C. Quick mix
3/4 C Brown Sugar
1 tsp Cinnamon
1 egg, well beaten
½ C milk
1 C quick rolled oats
1 C Semi sweet chocolate chips


Start by preheating your oven to 375 degrees.


Mix the quick mix, brown sugar and cinnamon together in a large bowl. Remember to always pack your brown sugar to measure it.


Measure out a cup of milk and beat the egg well.


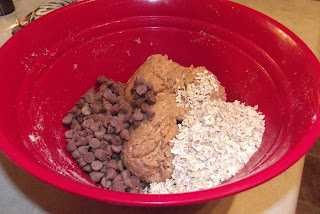
Mix these into your wet ingredients until well incorporated. Add the chocolate chips and oats, and mix them in as well. 


At this stage of the process I like to ditch the spoon and mix the ingredients into the dough with my hands.


Drop the dough by the spoonful onto an ungreased cookie sheet. You don't have to worry too much about having a ton of space in between, because these cookies won't expand much.


Bake 12-15 minutes. Once the peaks on the cookies are brown you should be good to go. Let them cool a little before you remove them from the pan. Enjoy! They are tasty!


Thursday, November 12, 2015

Sprouting Apple Seeds

This idea for sprouting apple seeds actually came about in the 1st or 2nd grade, when we sprouted some seeds at my house. I don't clearly recall if it was a school assignment or not, although it seems as though it may have been. I do remember those little fellows sprouting, though, so it must have been a success. Just remember that the tree you grow from your seed won't produce the same fruit as the apple it came from. It will be mystery fruit! This experiment will attempt to duplicate my previous results. First, you will need an apple, a knife and a cutting board.

Begin by cutting off the bits that you want to eat (or just eat the apple and save the core, I don't care for eating apples off the core.) Save the core, and try not to cut through any seeds as you are cutting the good bits off.

If you cut across the core you will notice that there are five chambers arranged in a star formation. Each chamber has an apple seed in it. Just shake or scoop the seeds out.

My apple had been sitting in my pantry for a while, so my seeds had already begun to sprout a little. I decided, though, that they might need a little more help to get all the way out of their little skins.

Place your apple seeds on a damp paper towel and fold the paper towel over, creating a little envelope.

Put your little seed packet in a zip top bag, but don't close the bag all the way. Leave it open just a little bit to vent any excess moisture.

Place your seed bag in a warm sunny area. I put mine on the window sill in my living room.
After a few days your seeds should have some sprouts coming out. Mine got a head start, having begun sprouting inside the apple. If your seeds are from a fresher apple, I should think that they would look like this in a week or so. Just keep checking on them!

Now  that you have some sprouts, you'll need a container in which to plant them. I saved and washed a yogurt cup to grow my little apple sprouts in.

Just be sure to drill some drainage holes in the bottom. If you don't have good drainage the sprouts may get moldy or rot and won't grow.

Fill the cup with some potting soil and choose your two best sprouts. Out of the five seeds I had, three of them sprouted. I chose the best two out of the three and planted those.

Place your little apple pot in a sunny spot. I put it in my kitchen window with some paper towels underneath to catch any leaks.

After two or three days I had a little plant popping up.

A few days after that I had two little plants.

I let them grow until one of them had five true leaves. (Not the little rounded guys that popped up initially, five proper apple tree leaves.) I culled the runt, and found a container to plant the remaining seedling in.

I used a big, 5 pound sour cream tub to transplant my seedling to. It's a good idea to have a container with a lid, so that you can flip the lid over and use it as a saucer. This will prevent leaks on your counter top and floor when you water.

Drill some drainage holes in the bottom of the container. I probably should have used a bigger drill bit for my holes, but I can always fix it later!


Shovel some potting soil into your container, leaving enough room for the plant to go on top, then fill in more soil around it once it's in the container. Water it well and let it drain, then place it on the saucer you've made from the lid. Keep your seedling indoors until it is big and strong enough to plant outdoors. This is as much as I know to teach you so far, but I will make updates in the future as the little sprout gets bigger.


Thursday, November 5, 2015

Cinder Block Kindling Rack


I feel like this is probably one of the cheapest and easiest projects I have made to date, and it has helped me get my woodpile all in order. The first thing you will need is a couple of cinder blocks. If you have some laying around, great! If not, I think I bought mine for about $1.75 at my local home improvement store.
Next you will need some scraps of lumber. Nothing too huge or beefy. I used some 1x2's that were left over from building our manger. I used a tape measure and pencil to mark them off into 24" lengths, or so. You will need four lengths of lumber.


Once your lumber is marked, grab up your best saw and trim them up. Arrange your cinder blocks so that the long sides are touching, and place each length of lumber in a hole, so that the bottom ends touch the inside edge of the hole.


Once you find a spot for your kindling rack, you can start stacking up the wood! Our rack is for holding the pieces of wood small enough to put into our rocket stove. That way I don't have to go searching for fuel the next time I get a hankering to do a project with it!